I taught an online class about safety in the jewelry shop awhile ago and I learned that many people do not have a dedicated work area. Part of safety in the shop is having the right tools to do the work and a place to use those tools.
So I am going to let you in on a project that I am doing. I am going to make a series of online learning opportunities combining my blog with YouTube videos. This will be 20 videos and blog posts centered around processes and techniques. Learning the “How and why” of jewelry making by doing 20 simple projects.
I have seen, and it was confirmed with discussion with others, that many online educational videos tend to assume that you have some experience with bench work. Many also assume that you have access to tools. Lots of tools and very expensive tools! This was a pet peeve of mine when I was just starting in the 80’s and it seems that nothing has really changed.
For this reason, I will be teaching basic processes and techniques at my jewelers’ bench. but when it comes time for the projects, I will teach with a very basic set of tools and will be working from a table outside of my shop or even my dining table.
To begin, I would encourage you to not work directly on your kitchen table because that can ruin a good piece of furniture very quickly. This is a project that will get you ready to make the 20 projects.
Here is a link to a video that I did that shows my setup working on my dining table. Please forgive the hair as this was filmed mid-COVID.

To make this project you will need to purchase the following items.
a can of urethane I prefer the brush-on type and not spray cans. I feel it makes a better surface to work on, a brush or two, a couple of sheets of medium 100-grit sandpaper & a couple of sheets of fine 220-grit sandpaper, a half dozen paper cups, a two-foot by two-foot sheet of 3/4 inch plywood, and some plastic sheet to work on.
Making your bench top.
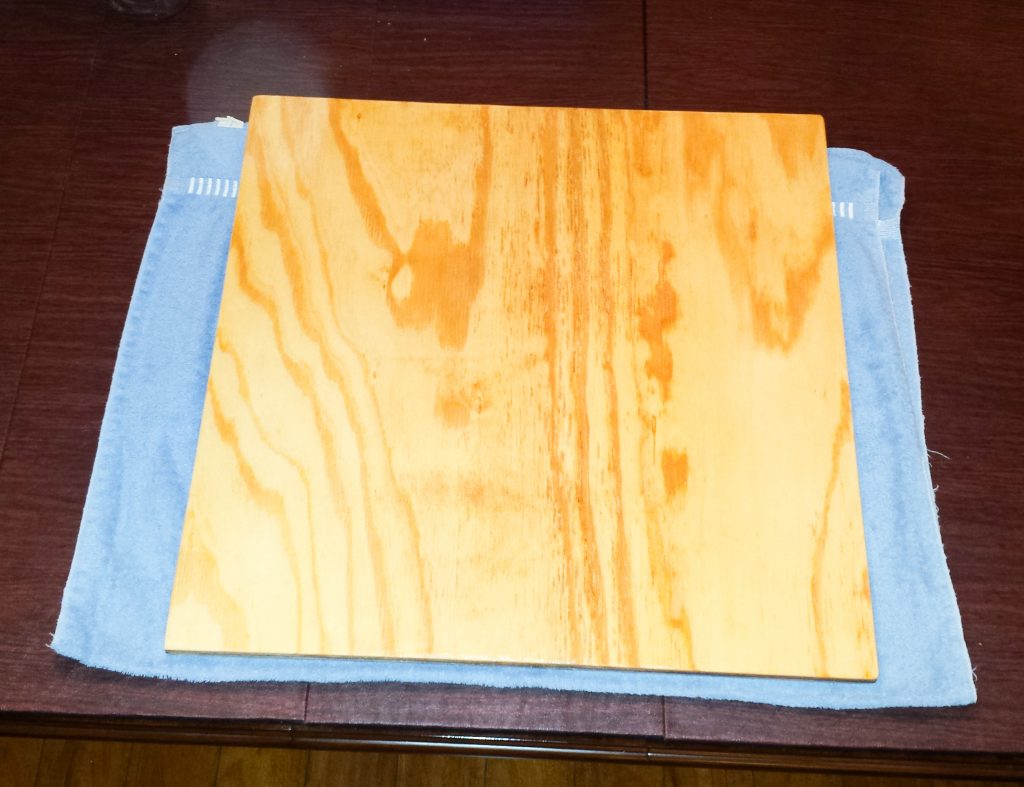
- lay out your plastic sheet somewhere you can work, then sand both sides of your plywood with the 100 grit paper. What you are trying to do is to remove splinters and sharp edges from the wood. Make sure you sand the edges well with the sandpaper to round them just a little bit so it is more comfortable when you rest your arms on the edge. After it is well sanded with the 100 grit, do the same thing with the 220 grit. this should go a lot faster as you are just finishing the surface and not trying to remove a large amount of material.
- You want to sweep up all of the sawdust you can, shake the plastic sheet to remove the sawdust and use a dry towel to dust your plywood.
- Using the paper cups to hold the plywood off of the surface of the plastic, you will want to use the urethane to coat the surface. Each coat should dry for 24 hours so set this up where it can dry away from pets and children. You should follow the instructions on the can for applying this to the wood. Make sure you get the urethane worked well into the edges. After letting this dry for 24 hours you will want to use your 220-grit sandpaper to smooth the surface and remove any air bubbles. you will want to use three coats on the top.
- After you are finished putting 3 coats of urethane on the top and sides, you will want to flip it over and add at least 2 coats on the bottom. This is not required but I would use a soft pencil and sign your name in the corner with the date. You are being creative so you should sign it. Maybe in 40 or 50 years someone will acquire and look up your art online.
- After you have finished with the urethane, this project is done. All you need is a large towel that you can fold in half and will sit under this to protect any surfaces you work on. I suggest going to a second-hand shop or goodwill-type store where you can pick up one for a buck or two.
This is the work surface you will be making your projects on with a basic set of tools.
The following blog post gives you an idea of some basic tools. a few are specific to the jewelry trade while most can be found easily in second-hand stores. If you buy them second-hand, make sure you give them some maintenance so they work as they should.
https://livingstonjewelers.com/blog/a-basic-tool-set-for-jewelers/
The 20 projects will be designed to reinforce the basic processes and techniques you need to become competent at making jewelry. My goal is that at the end of all 20 projects, you will know enough to make jewelry safely and well. Start with this to make a place to work, and soon the next project will be posted.
Thanks and good luck!

One comment on “Learning the “How and why” of jewelry making.”